画像から不要なもの消すことができるIOPaintを Windows にインストールする方法
インストール
https://github.com/Sanster/IOPaint
簡単にインストールする方法Lama Cleanerだけ
仮想環境を作らないでインストール
pip3 install torch==2.1.2 torchvision==0.16.2 --index-url https://download.pytorch.org/whl/cu118
pip3 install iopaint
起動する
start http://localhost:8080/

iopaint start --model=lama --device=cpu --port=8080
プラグインも含めて仮想環境にインストールするバッチファイル
1回目起動時はインストールしてWeb 画面でコンフィグファイルを作成します
2回目以降は通常起動になります
torchはインストールしておいてください
環境に依存するので仮想環境を作成した方が良い
@echo off
call %~dp0\scripts\env_for_icons.bat  %*
SET PATH=%PATH%;%WINPYDIRBASE%\PortableGit;%WINPYDIRBASE%\PortableGit\bin
SET PATH=%PATH%;%WINPYDIRBASE%\ffmpeg\bin
If not exist %WINPYDIRBASE%\content mkdir  %WINPYDIRBASE%\content

set APP_NAME=IOPaint
set APP_DIR=%WINPYDIRBASE%\content\%APP_NAME%
echo %APP_DIR%
cd %WINPYDIRBASE%\content\

If not exist  %APP_DIR% git clone https://github.com/Sanster/IOPaint.git

cd %APP_DIR%
if not defined VENV_DIR (set "VENV_DIR=%APP_DIR%\venv")
if EXIST %VENV_DIR% goto :activate_venv

::python.exe -m venv "%VENV_DIR%"
python.exe -m venv "%VENV_DIR%" --system-site-packages
if %ERRORLEVEL% == 0 goto :pip
echo Unable to create venv
goto :skip_venv

:pip
call "%VENV_DIR%\Scripts\activate"
pip install -r requirements.txt
@call pip3 install -U iopaint

@call iopaint install-plugins-packages

start iopaint  start-web-config
cmd.exe /k

:activate_venv
call "%VENV_DIR%\Scripts\activate"

::start iopaint start  --model=lama --device=cuda  --port=8080
start iopaint start  --model=lama --device=cuda  --port=8080 --model-dir=%APP_DIR%\models --config %APP_DIR%\config.json
goto :skip_venv
:skip_cmd
::
:skip_venv
::cmd.exe /k
 timeout /t 55
設定画面
start iopaint start-web-config
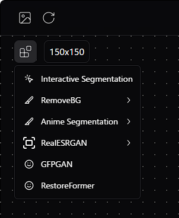
必要なプラグインも有効にしてください
モデルの保存場所も変更した方が良い

config.json
{
    "host": "127.0.0.1",
    "port": 8080,
    "inbrowser": true,
    "model": "lama",
    "no_half": false,
    "low_mem": false,
    "cpu_offload": false,
    "disable_nsfw_checker": false,
    "local_files_only": false,
    "cpu_textencoder": false,
    "device": "cuda",
    "input": null,
    "mask_dir": null,
    "output_dir": null,
    "quality": 95,
    "enable_interactive_seg": true,
    "interactive_seg_model": "sam2_1_tiny",
    "interactive_seg_device": "cuda",
    "enable_remove_bg": true,
    "remove_bg_device": "cuda",
    "remove_bg_model": "briaai/RMBG-1.4",
    "enable_anime_seg": true,
    "enable_realesrgan": true,
    "realesrgan_device": "cuda",
    "realesrgan_model": "realesr-general-x4v3",
    "enable_gfpgan": true,
    "gfpgan_device": "cuda",
    "enable_restoreformer": true,
    "restoreformer_device": "cuda",
    "model_dir": "C:\\Users\\User\\.cache"
}
プラグイン
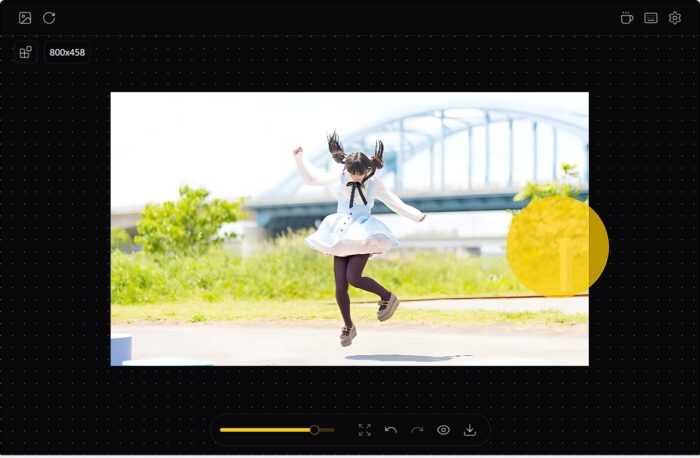
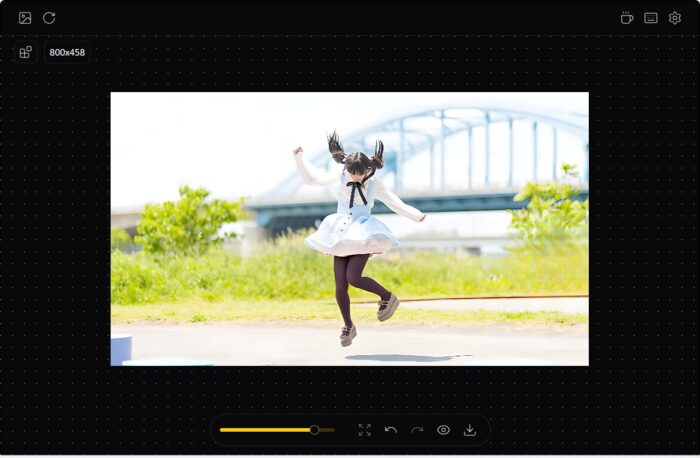
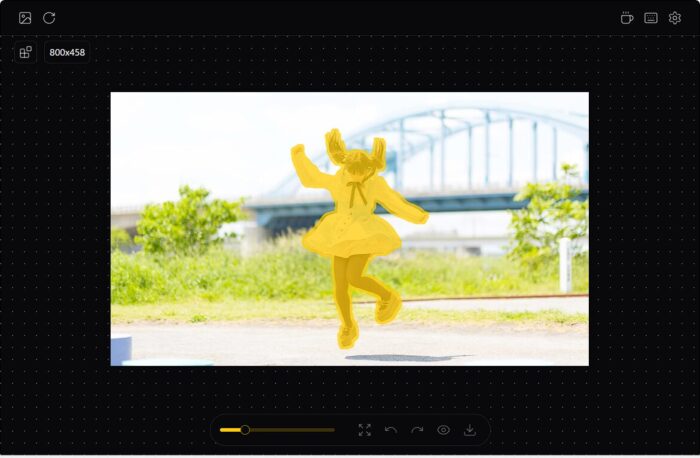
サンプル
一括処理
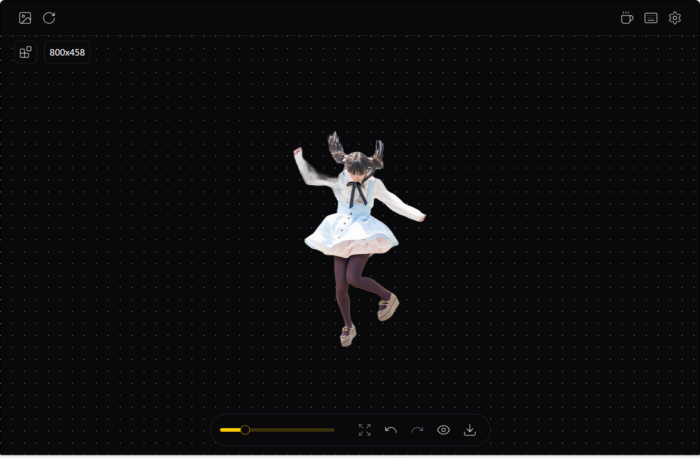
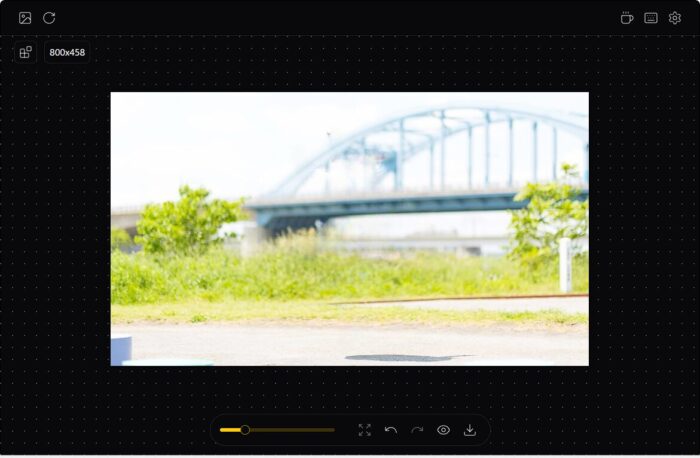
inputディレクトリに画像を保存。
元画像と同じ解像度で背景が黒で修正したい部分を白の画像を作成し
元画像と同じファイル名でMask用のディレクトリに保存
iopaint run --model=lama --device=cuda --image=input_dir --mask=mask_dir --output=output_dir
1つのマスクを複数の画像に適用
@echo off
call %~dp0\scripts\env_for_icons.bat  %*
SET PATH=%PATH%;%WINPYDIRBASE%\PortableGit;%WINPYDIRBASE%\PortableGit\bin
SET PATH=%PATH%;%WINPYDIRBASE%\ffmpeg\bin
If not exist %WINPYDIRBASE%\content mkdir  %WINPYDIRBASE%\content

set APP_NAME=IOPaint
set APP_DIR=%WINPYDIRBASE%\content\%APP_NAME%
echo %APP_DIR%
cd %WINPYDIRBASE%\content\

cd %APP_DIR%
if not defined VENV_DIR (set "VENV_DIR=%APP_DIR%\venv")
if EXIST %VENV_DIR% goto :activate_venv
cmd.exe /k

:activate_venv
call "%VENV_DIR%\Scripts\activate"
md Y:\image
md Y:\output_dir
set sourceDir=C:\data\img\380
set destDir=Y:\image
copy "%sourceDir%\*.*"  "%destDir%" /Y

set maskDir=Y:\mask
for %%A in ("%sourceDir%\*.*") do (
  copy "C:\data\380px.jpg"  "%maskDir%\%%~nxA" /Y
)
iopaint run --model=lama --device=cuda --image=Y:\image --mask=Y:\mask --output=Y:\output_dir --model-dir=%APP_DIR%\models
timeout /t 55
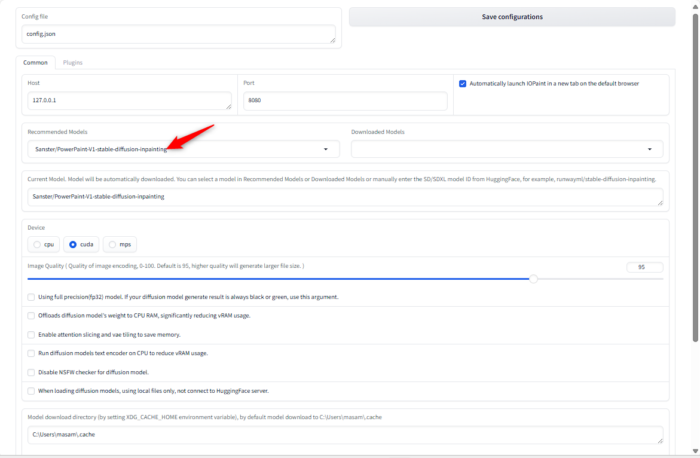
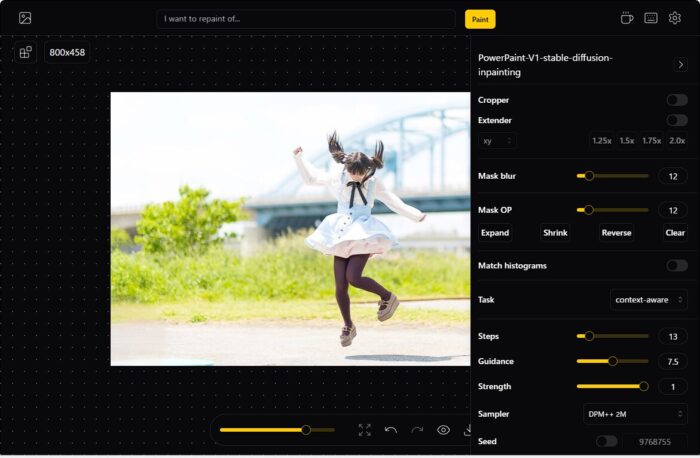
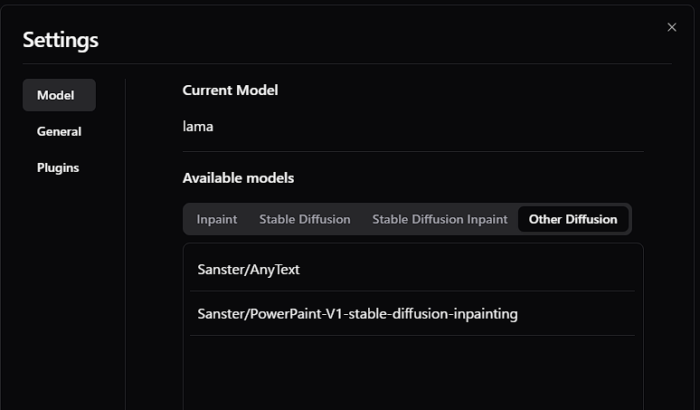
PowerPaint-V1-stable-diffusion-inpaintingなどの様々なモデル
モデル

Recommended Models
lama
mat
migan
runwayml/stable-diffusion-inpainting
Uminosachi/realisticVisionV51_v51VAE-inpainting
redstonehero/dreamshaper-inpainting
Sanster/anything-4.0-inpainting
diffusers/stable-diffusion-xl-1.0-inpainting-0.1
Fantasy-Studio/Paint-by-Example
RunDiffusion/Juggernaut-XI-v11
SG161222/RealVisXL_V5.0
eienmojiki/Anything-XL
Sanster/PowerPaint-V1-stable-diffusion-inpainting
Sanster/AnyText
モデルを指定することで他の拡張機能を使うことが可能です
起動方法
start iopaint start --device=cuda --port=8080 --model-dir=%APP_DIR%\models --config %APP_DIR%\config.json
画面
次のフォルダーなどに自動でダウンロードされます
E:\WPy64-31241\content\IOPaint\models\huggingface\hub\models--Sanster--PowerPaint-V1-stable-diffusion-inpaintingモデルを指定する他のやり方
::


set APP_NAME=IOPaint
set APP_DIR=%WINPYDIRBASE%\content\%APP_NAME%

start iopaint start  --model Sanster/PowerPaint-V1-stable-diffusion-inpainting --device=cuda  --port=8080 --model-dir=%APP_DIR%\models --config %APP_DIR%\config.json
モデル名をパラメーターで指定します
一旦ダウンロードすると設定画面から変更できるのでバッチファイルをたくさん作って対応しても良いと思います
huggingface-hub(CLI)を使ったモデルのダウンロード
huggingface-hub==0.23.0 動かないようなので新しい環境で試してください
set  HF_HOME=~/.cache/huggingface
set  HF_HOME=E:\WPy64-31241\content\IOPaint\models\huggingface

hf download Fantasy-Studio/Paint-by-Example
AttributeError: module 'numpy’ has no attribute 'int0’. Did you mean: 'int8’?
NumPy 1.20までしか使えないのでint64に変更します
“E:\WPy64-31241\content\IOPaint\venv\Lib\site-packages\iopaint\model\anytext\utils.py"
box = np.int64(box)
モデルの配置
models
|
+---huggingface
|   \---hub
|       |   version.txt
|       |   version_diffusers_cache.txt
|       |
|       +---.locks
|       |   +---models--openai--clip-vit-large-patch14
|       |   +---models--Sanster--AnyText
|       |   \---models--Sanster--PowerPaint-V1-stable-diffusion-inpainting
|       +---models--openai--clip-vit-large-patch14
|       |   +---.no_exist
|       |   |   \---32bd64288804d66eefd0ccbe215aa642df71cc41
|       |   |           adapter_config.json
|       |   |           added_tokens.json
|       |   |           chat_template.jinja
|       |   |
|       |   +---blobs
|       |   +---refs
|       |   |       main
|       |   |
|       |   \---snapshots
|       |       \---32bd64288804d66eefd0ccbe215aa642df71cc41
|       |               config.json
|       |               merges.txt
|       |               model.safetensors
|       |               special_tokens_map.json
|       |               tokenizer.json
|       |               tokenizer_config.json
|       |               vocab.json
|       |
|       +---models--Sanster--AnyText
|       |   +---blobs
|       |   +---refs
|       |   |       main
|       |   |
|       |   \---snapshots
|       |       \---b0d51010991b3bdb4f0975ddace24a560328e46f
|       |               model_index.json
|       |               pytorch_model.fp16.safetensors
|       |               SourceHanSansSC-Medium.otf
|       |
|       \---models--Sanster--PowerPaint-V1-stable-diffusion-inpainting
|           +---blobs
|           +---refs
|           |       main
|           |
|           \---snapshots
|               \---4104236baefdb2a1dd0f32812d8edbbfc4efd164
|                   |   model_index.json
|                   |
|                   +---feature_extractor
|                   |       preprocessor_config.json
|                   |
|                   +---safety_checker
|                   |       config.json
|                   |       model.fp16.safetensors
|                   |
|                   +---scheduler
|                   |       scheduler_config.json
|                   |
|                   +---text_encoder
|                   |       config.json
|                   |       model.fp16.safetensors
|                   |
|                   +---tokenizer
|                   |       added_tokens.json
|                   |       merges.txt
|                   |       special_tokens_map.json
|                   |       tokenizer_config.json
|                   |       vocab.json
|                   |
|                   +---unet
|                   |       config.json
|                   |       diffusion_pytorch_model.fp16.safetensors
|                   |
|                   \---vae
|                           config.json
|                           diffusion_pytorch_model.fp16.safetensors
|
+---stable_diffusion
|       iopaint_cache.json
|       v1-5-pruned-emaonly.safetensors
|
\---torch
    \---hub
        \---checkpoints
                big-lama.pt